
How to deploy your Jesse project into the production server
You have developed a great strategy, and now want to trade it live. In this tutorial, I will show you step by step, how to deploy your project from your local machine into a VPS for production.
I highly recommend using a VPS for production instead of running the bot on your local machine for reasons such as:
- More reliable Internet connection
- Freedom to restart your computer without worrying about terminating your trading session
- Using the exact recommended hardware and OS. Linux is the best OS for production but most development machines are either Windows or macOS.
- And more!
The installation and configuration of a Linux VPS seem scary to some users. But don't worry, because I will cover you through the process.
What about security? I will show you how to take care of that too.
Recommended cloud provider
Here is a list of providers that I recommend based on my experience:
- Hetzner (Best for Europeans)
- Digital Ocean (Best for other countries)
I'll be using an Ubuntu 20.04 VPS which is offered by almost all cloud providers.
I've been using Hetzner for past years because not only it has the cheapest price, but also it has the highest quality among providers that I tried. Its starting plan which comes with 1 core CPU and 2GBs of RAM is what I've been using for running Jesse and it costs ~€3.5 per month.
You can use my referral links for Hetzner or Digital Ocean which gives you €20 or $100 free credits at the time of sign up. So getting started is free.
Creating a cloud VPS
After logging into your Hetzner account, choose the default project, or create a new one. Then click on the red "Add server" button. You can choose the location of the server as whatever you want it to be. I usually choose Germany. Just don't choose the US if the exchange that you're trading doesn't accept US citizens.
As for the "Image", choose Ubuntu 20.04:

Next, you need to add/choose an SSH key and give your server a name. The name could be anything you want it to be.
As for the SSH key, if you have one, just copy it from your local system and add it. If you haven't created one already, go you Github's guide and follow the instruction for your OS to create one. It'll only take a minute. And then, add it into the SSH key section:

Now go ahead and click on "CREATE & BUY NOW".
Creating a Jesse project
If you're reading this article, that means you already have your Jesse project. But for the sake of this tutorial, I'll be creating a new one:
# tutorial-deploy  is the name of my project. It could be anything you want
git clone https://github.com/jesse-ai/project-template tutorial-deploy
And next I cd into it:
cd tutorial-deploy
Creating the Github repository
I will be using Github as my source control system. So I'll be creating a new repository for my project.
If you're not familiar with Git, I highly recommend checking out this YouTube video to get started with it. Git is a very useful version manager and services such as Gitlab or Github are real-life savers for development.
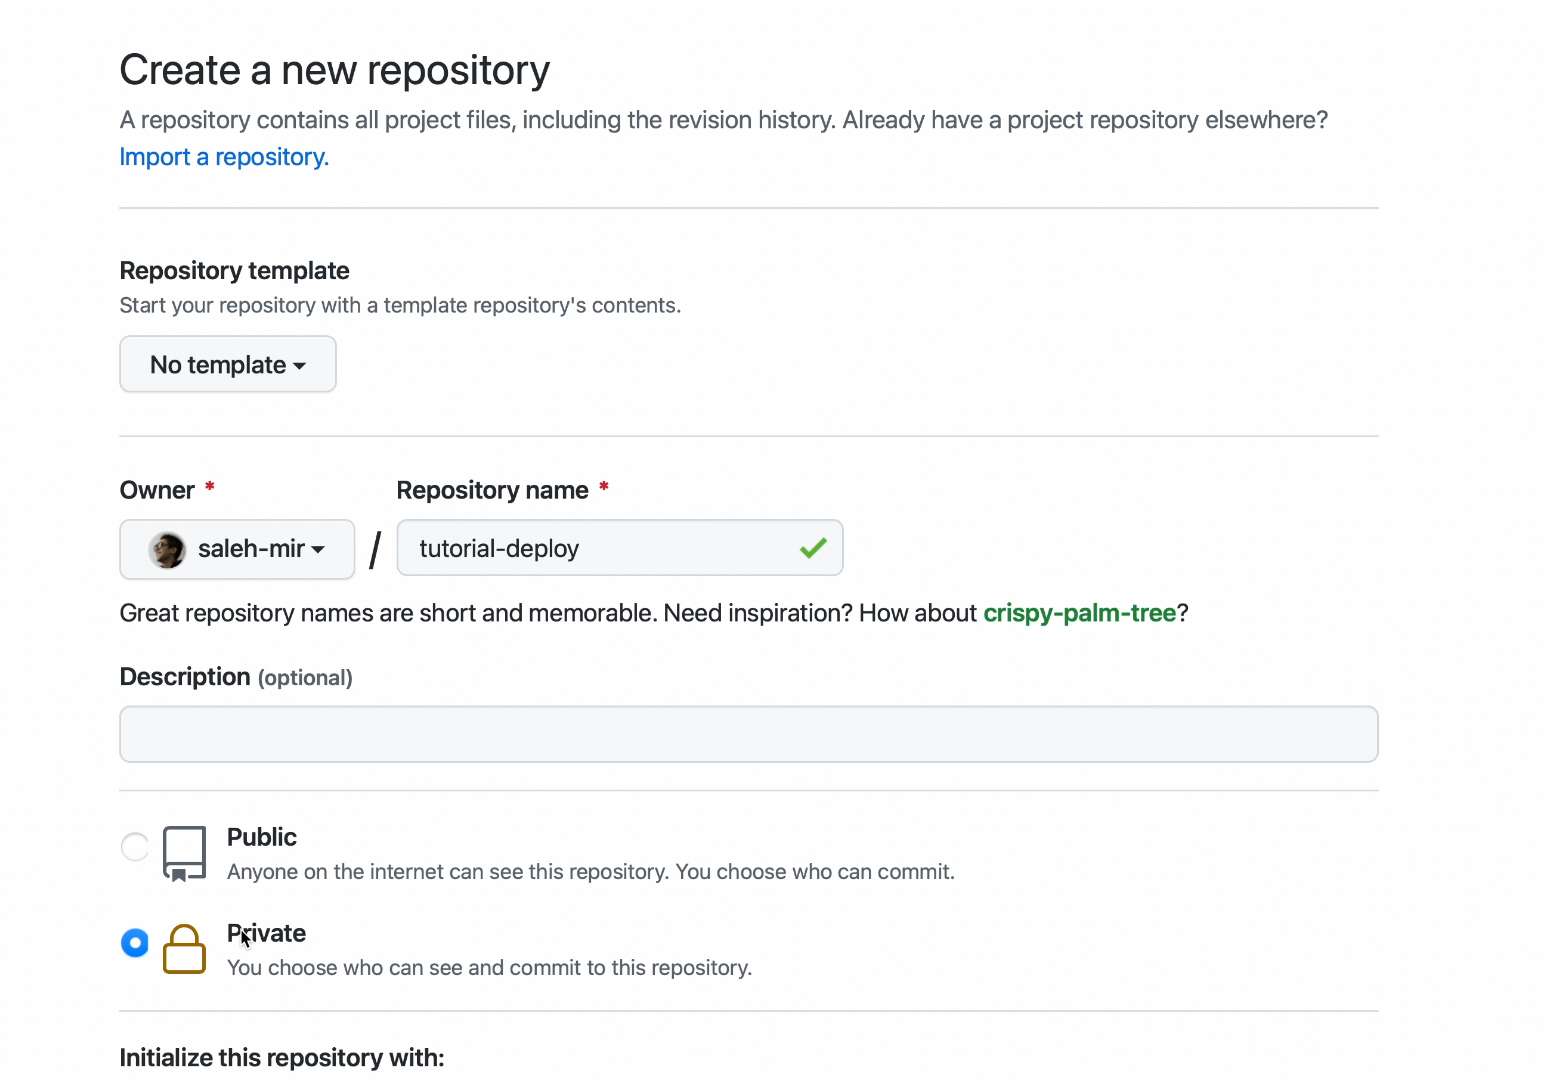
Creating a new repository is pretty simple. Just make sure to set it to "private" to make sure that only you can see it:
Pushing project's source code to Github
Now go back to the project directory and push the code to the Github repository:
rm -rf .git
git init
git add .
git commit -m "first commit"
git branch -M main
git remote add origin [email protected]:saleh-mir/tutorial-deploy.git
git push -u origin main
Pulling the project's source code into the VPS
Now I need to retrieve the files from the server. The first thing I need to do is to give my VPS access to this private repository. For that, I need to create an SSH key, and add it to my Gitlab account's SSH:
ssh-keygen
It'll ask for the location to store my keys, and I just choose the default one by pressing Enter. Next, it'll ask for a passphrase, which I skip by pressing Enter. And of course, one more time for confirmation.
After that, my keys are generated and I can see it by executing:
cat /root/.ssh/id_rsa.pub
I now copy my SSH key and paste it into my Github account's SSH keys page and click on "New SSH key":
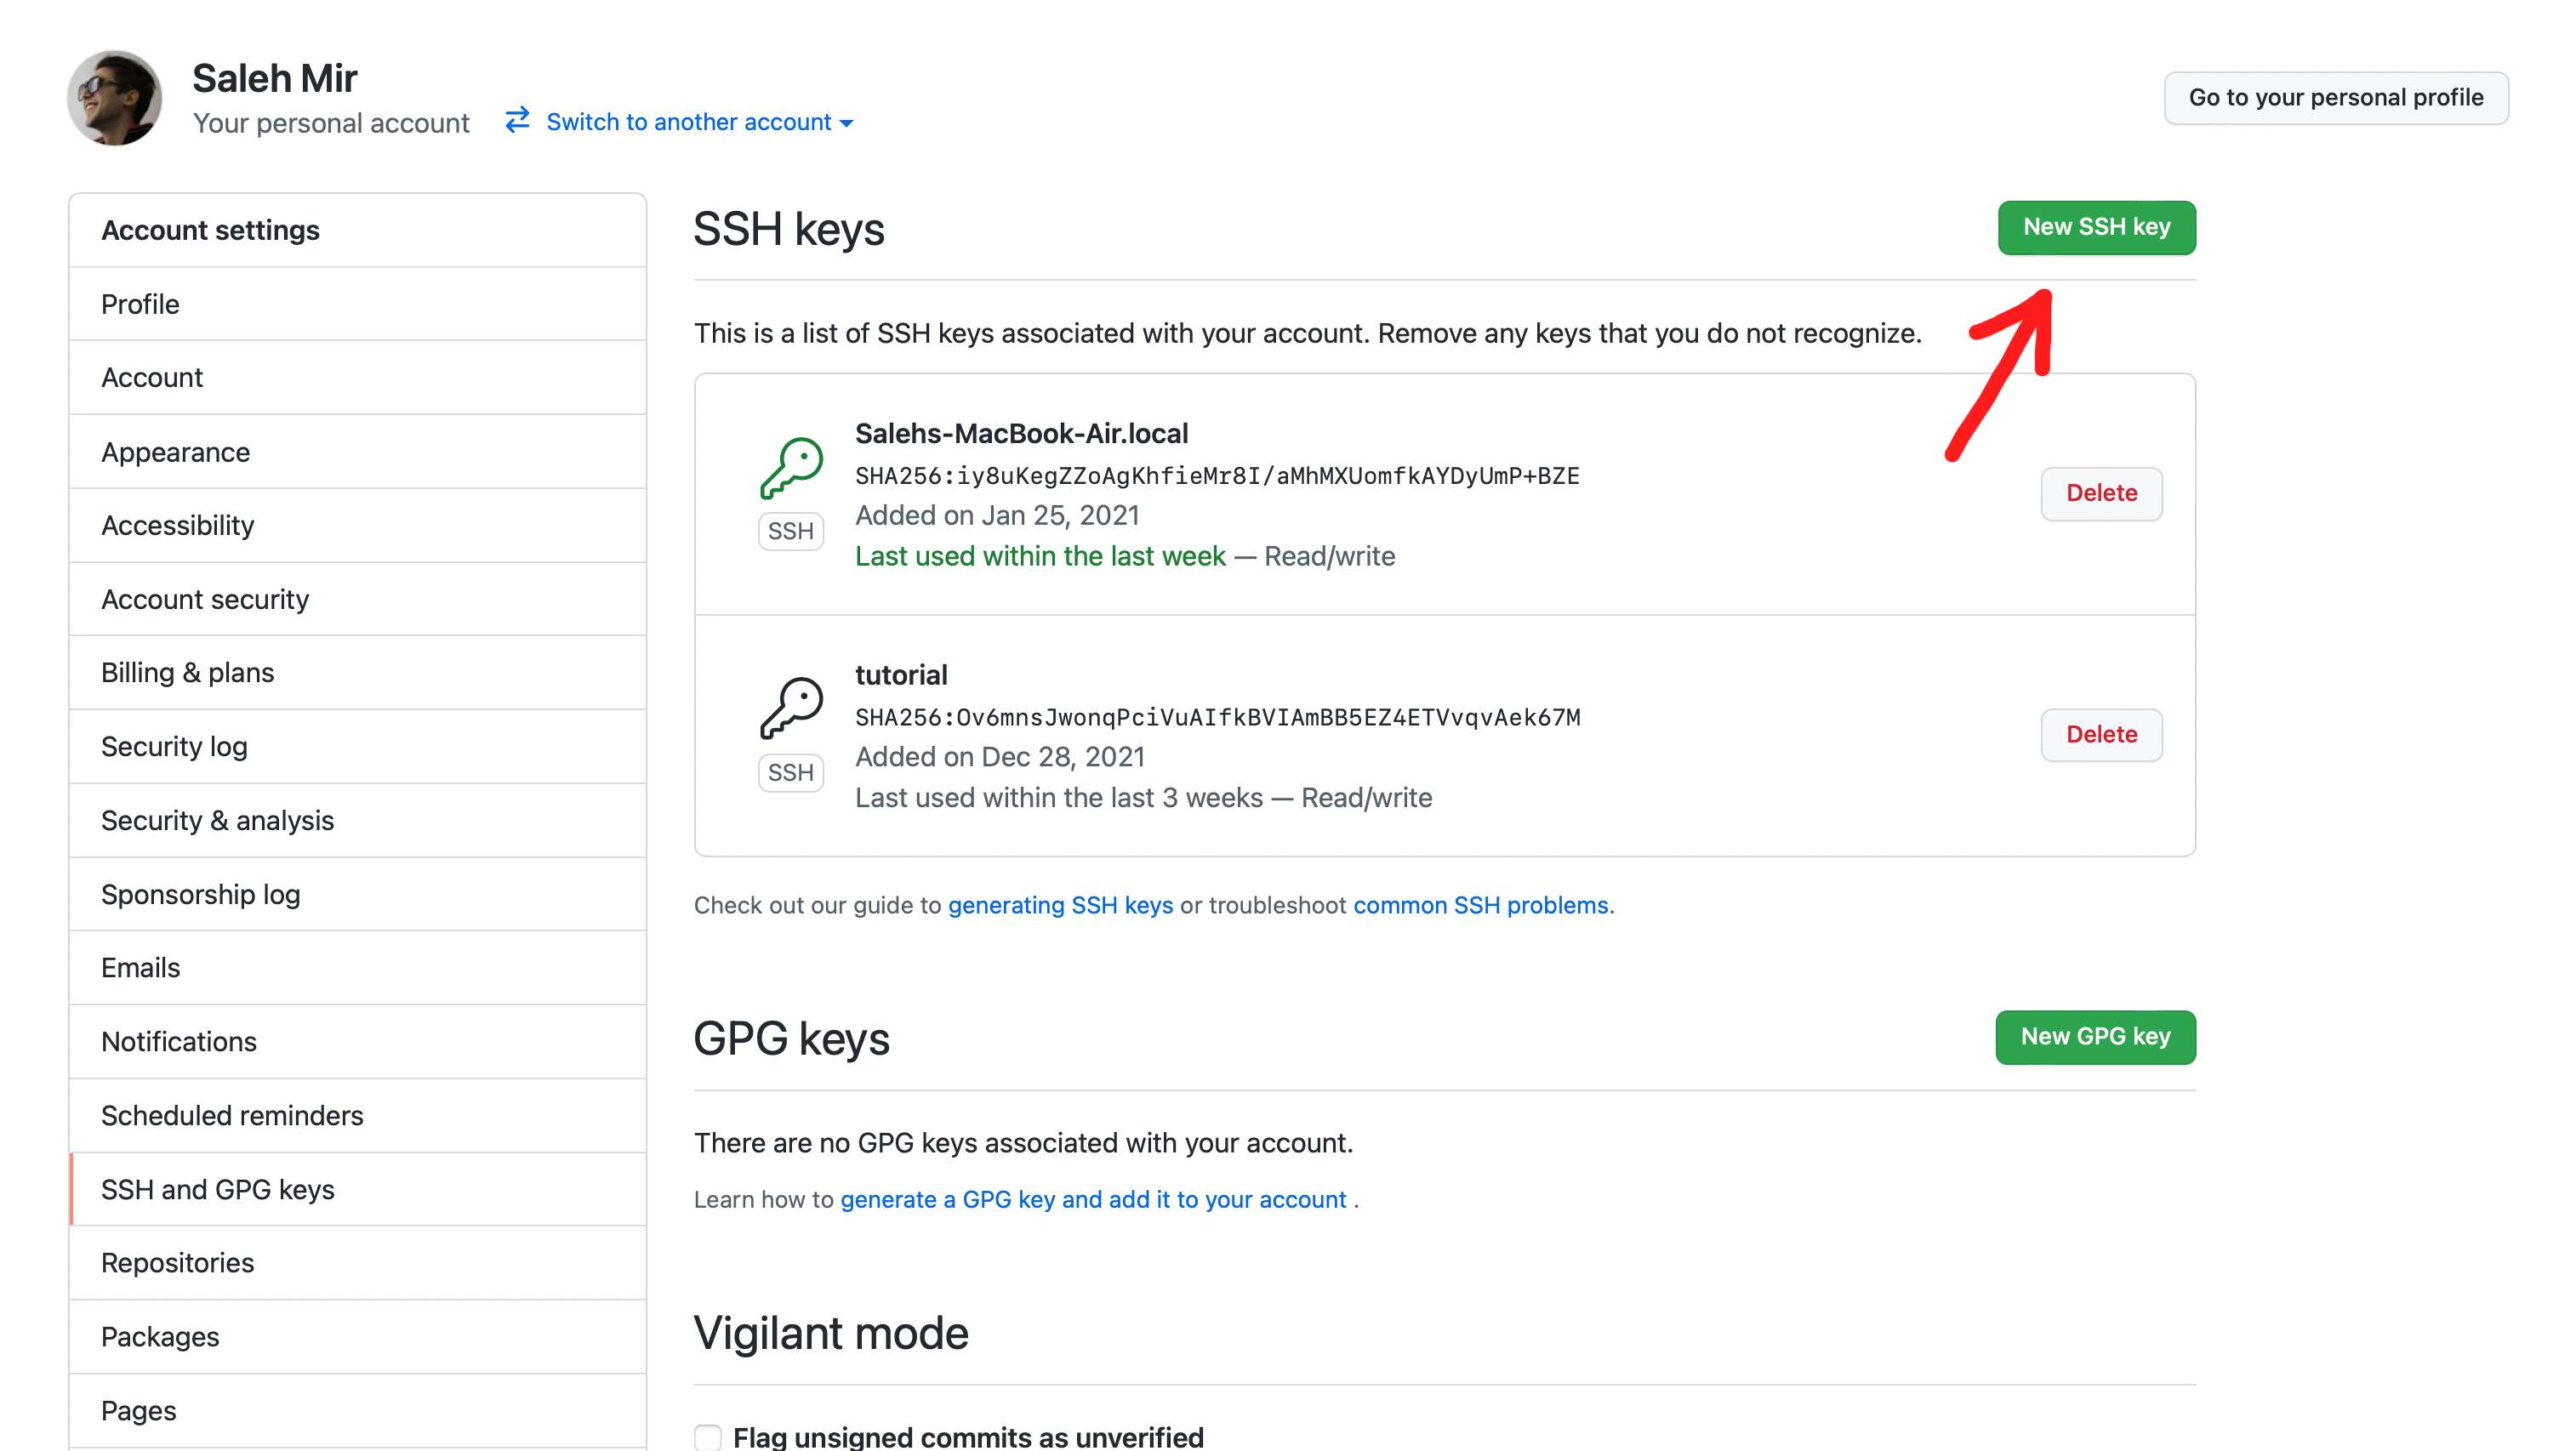
Now paste your SSH key in the key section, give it a title (could be anything you want), and click on "Add SSH key" button.
Now I can head back to the server and pull the code from the Github repository:
git clone [email protected]:saleh-mir/tutorial-deploy.git
Type yes for confirmation. Now open the project by typing cd tutorial-deploy . Notice that our project is missing the .env file. That's because they are added into the .gitignore files of projects created by Jesse. This is to make sure that your sensitive API keys and such, are not accidentally pushed to the repository.
I can create one by copying the .env.example file and then editing it:
cp .env.example .env
Docker
The next step is to install Python, PostgreSQL, and all the dependencies that Jesse uses. But instead, we can use Docker. I highly recommend using Docker for its ease of use and future updates of the project.
So I will install Docker and Docker Compose:
# install docker
curl -fsSL https://get.docker.com -o get-docker.sh && sudo sh get-docker.sh
# install docker-compose
sudo curl -L "https://github.com/docker/compose/releases/download/1.25.0/docker-compose-$(uname -s)-$(uname -m)" -o /usr/local/bin/docker-compose && sudo chmod +x /usr/local/bin/docker-compose
Now if everything went well, I should be able to run the docker-compose command:
docker-compose
Before I start the containers, I'm gonna make sure that the live-trade plugin will be installed as well.
The live-trade plugin
If you are reading this, I assume you already have a valid license for the live trade plugin. If you don't, please head over to Jesse's website, register, and purchase a license.
Now, you need to create a license access key. Assuming you are already logged in to your Jesse.Trade account, go into the API Tokens page and generate a new token:
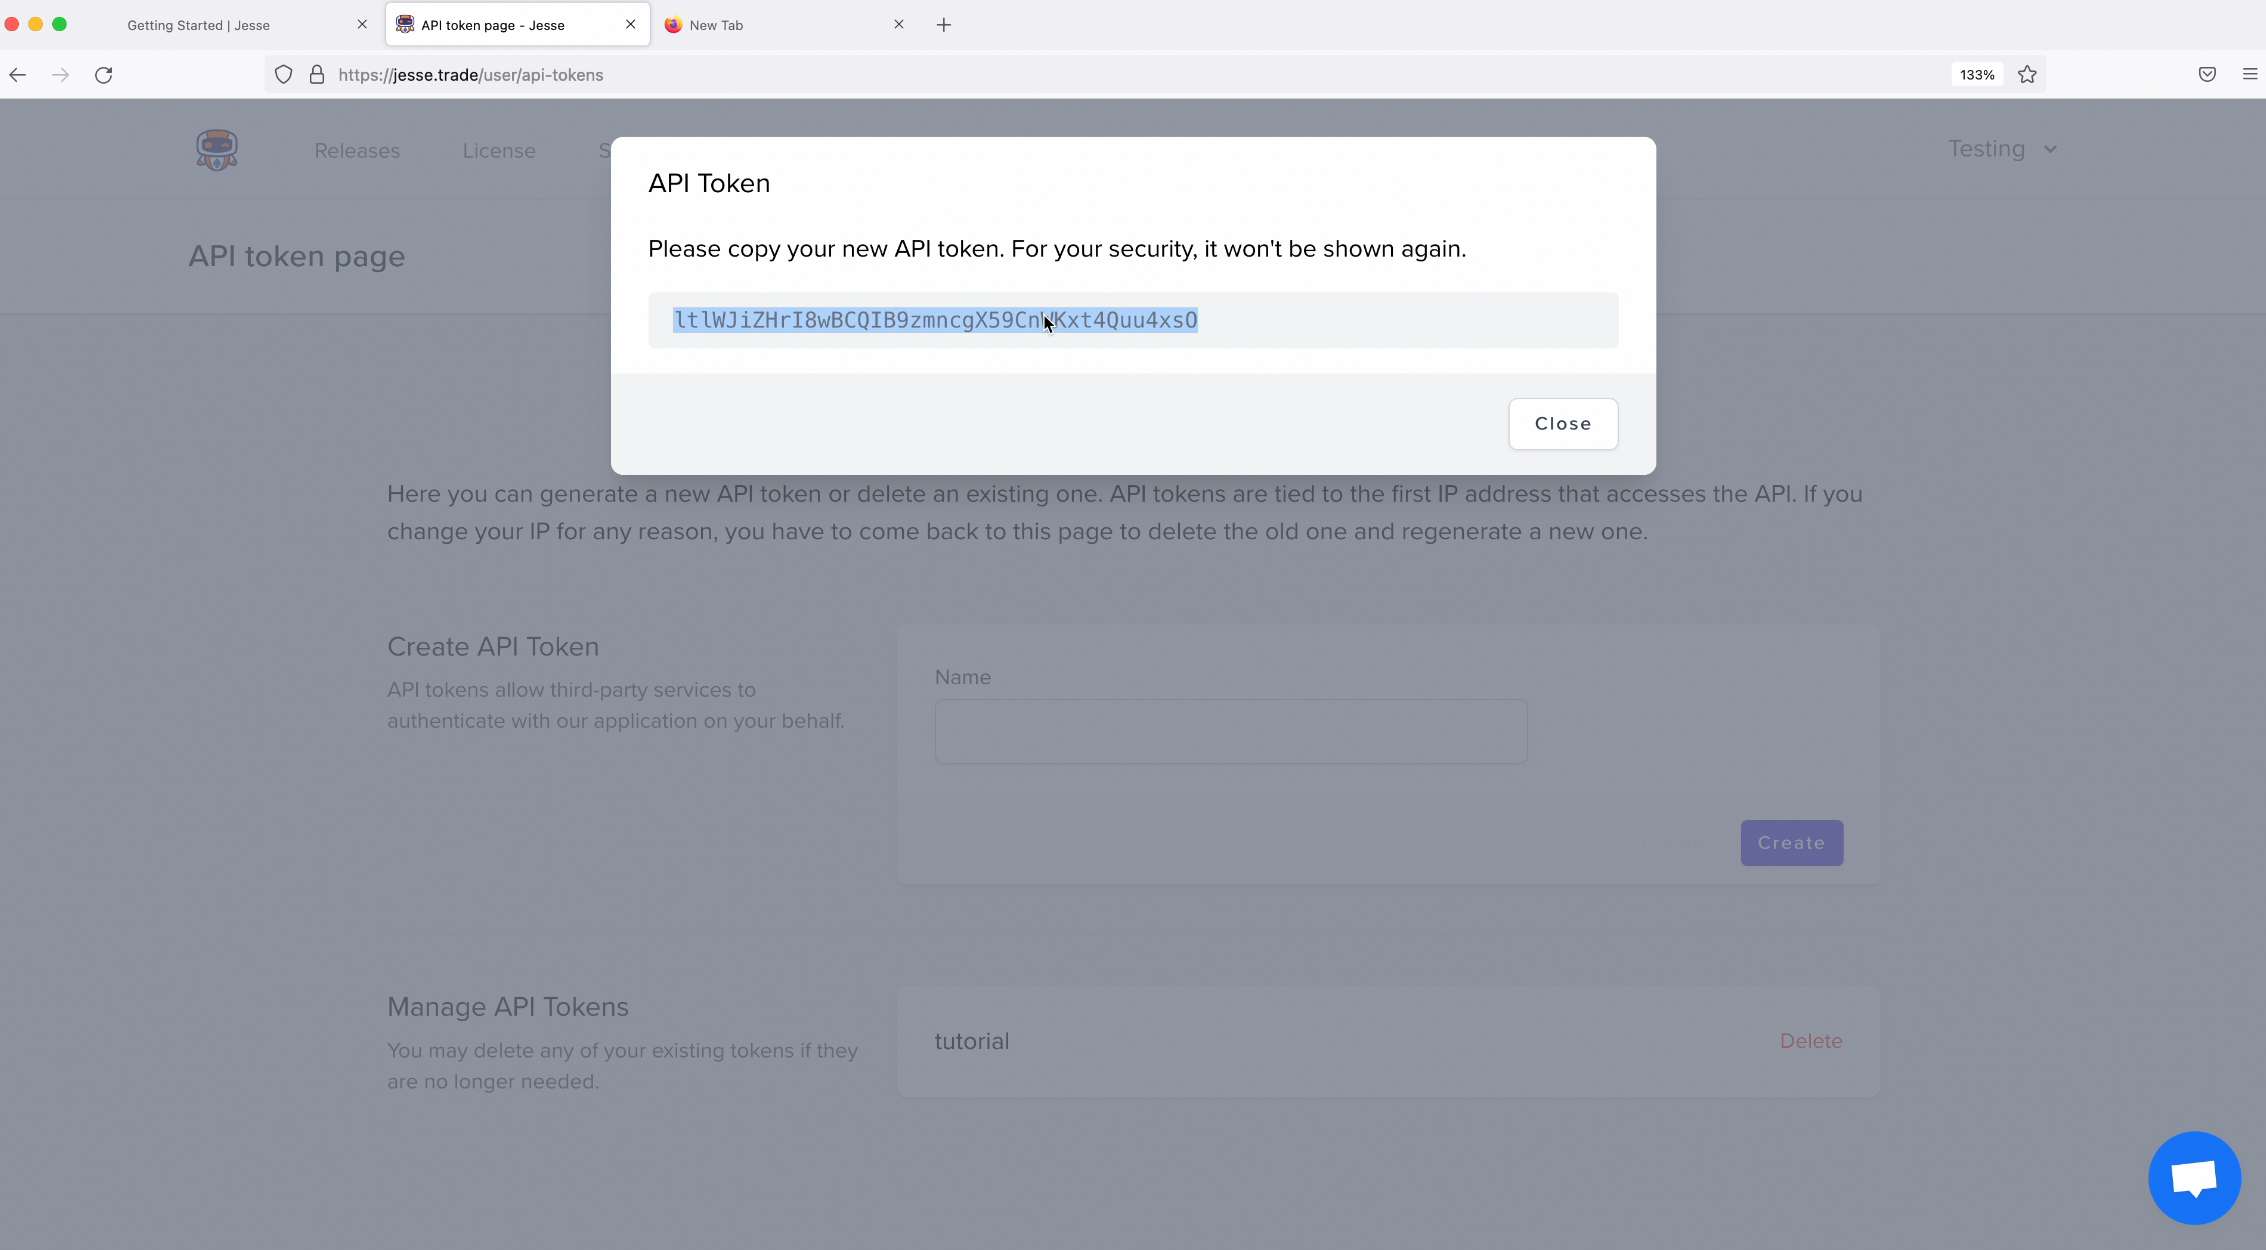
Then copy the token and paste it into the LICENSE_API_TOKEN variable inside your project's .env file.
That's all you had to do for installing the live-trade plugin. Now, let's start the containers.
Running the dashboard
The default docker files are inside your project's docker directory. Cd into it:
cd docker
And now we can start the containers:
docker-compose up -d
Notice that I added a -d flag to the docker-compose up command. This means that the containers will be running in the background. So even if you close your terminal or turn off your computer, the containers will still be running and so will your live sessions.
Exchange API keys, Telegram/Discord notifications
For Jesse to be able to connect to exchange to execute trades, I have to enter my exchange API keys, and for it to be able to send me notifications I have to enter my keys for either Telegram or Discord (or both!).
I can do that by modifying the .env file which contains this info. First, make sure that you already have generated the API keys on your target exchange and notification driver.
Now stop the containers, edit the .env file, and then start the containers again:
# to stop the containers
docker-compose stop
# to go back to the root of the project
cd ..
# to edit the .env file
nano .env
# to go back to the docker directory
cd docker
# to start the containers
docker-compose up -d
Starting and monitoring the running bot
Now everything is in place I can go to the "live" tab in the dashboard, pick the correct exchange, symbol, timeframe, and strategy, and maybe check the "paper" mode if I want to.
It is usually useful to check the "debug mode" as well since it'll cause the bot to log more information which could come in handy when troubleshooting.
And at the end, click on the "Start" button.

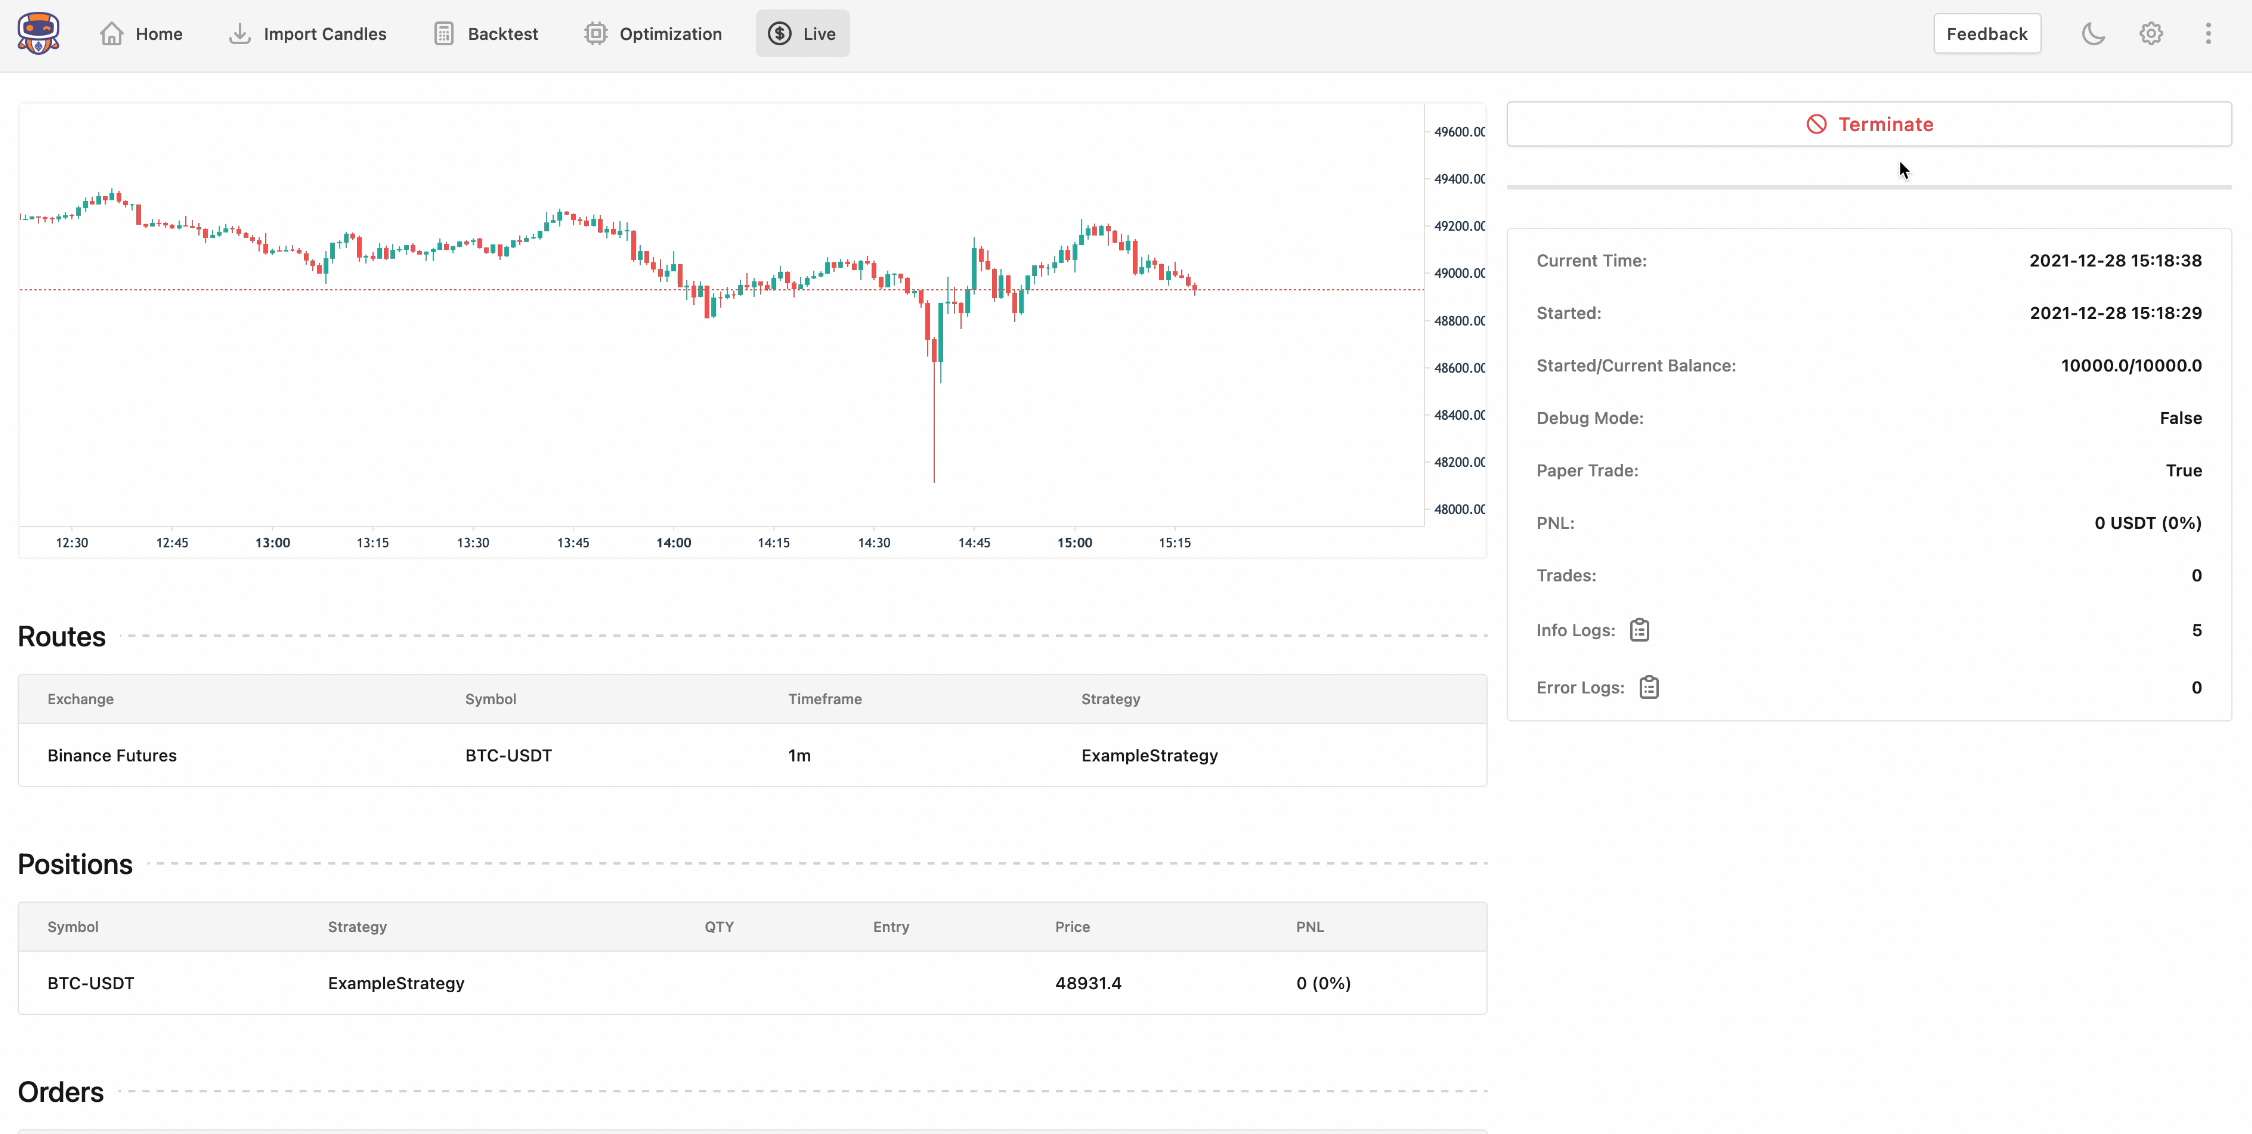
If everything went well, you should see the live session running like this:
Security
They say that you can never reach a 100% security level, so I won't make that promise. But in this case, I think the below steps should be more than enough:
- Change the password (PASSWORD) in your .env file. Make sure to set it to something secure. You can use a password generator service to generate a strong password.
- Make sure the exchange API keys you generated don't have withdrawal access.
- Restrict the access to the server to your IP address ONLY. You'll need a firewall for that:
Firewall setup
The dashboard is supposed to be accessible only by you. That makes it easy to secure. So the best and easiest way is to close all incoming ports except for the ones you need. But even for ports that we need, it would be much safer if we could limit access to trusted IP addresses only.
This can be done via both a firewall from within the server or the firewall that your cloud provider provides (Hetzner, DigitalOcean, etc).
I usually use ufw which is a firewall that comes with the Linux distribution. But unfortunately, it doesn't play nice with docker. So instead, I will use Hetzner's firewall service which is free to use.
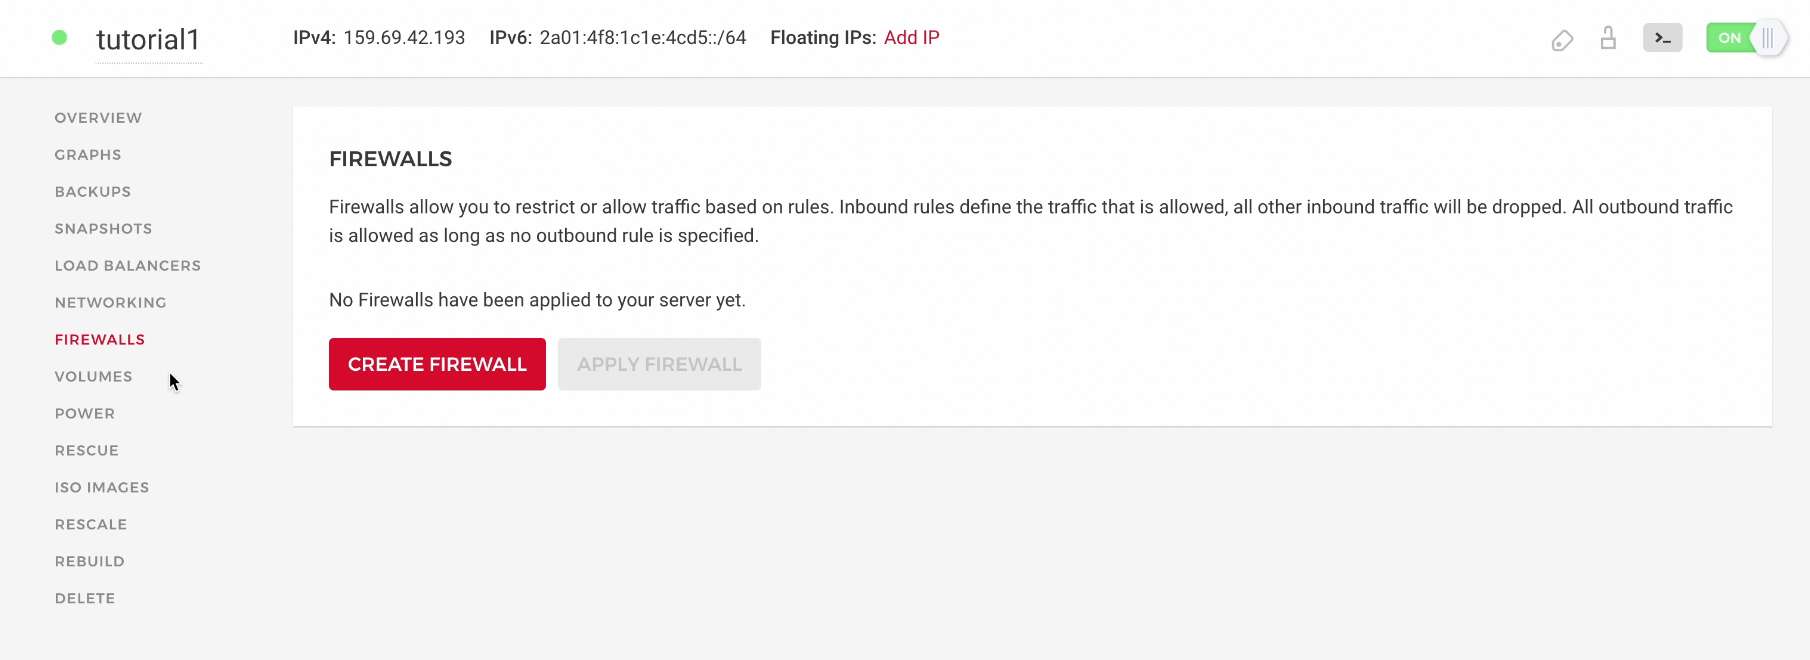
Go into your server's page and click on the "Firewalls" tab and click on the "CREATE FIREWALL" button:
First, find your local machine's IP address by using a website such as this one.
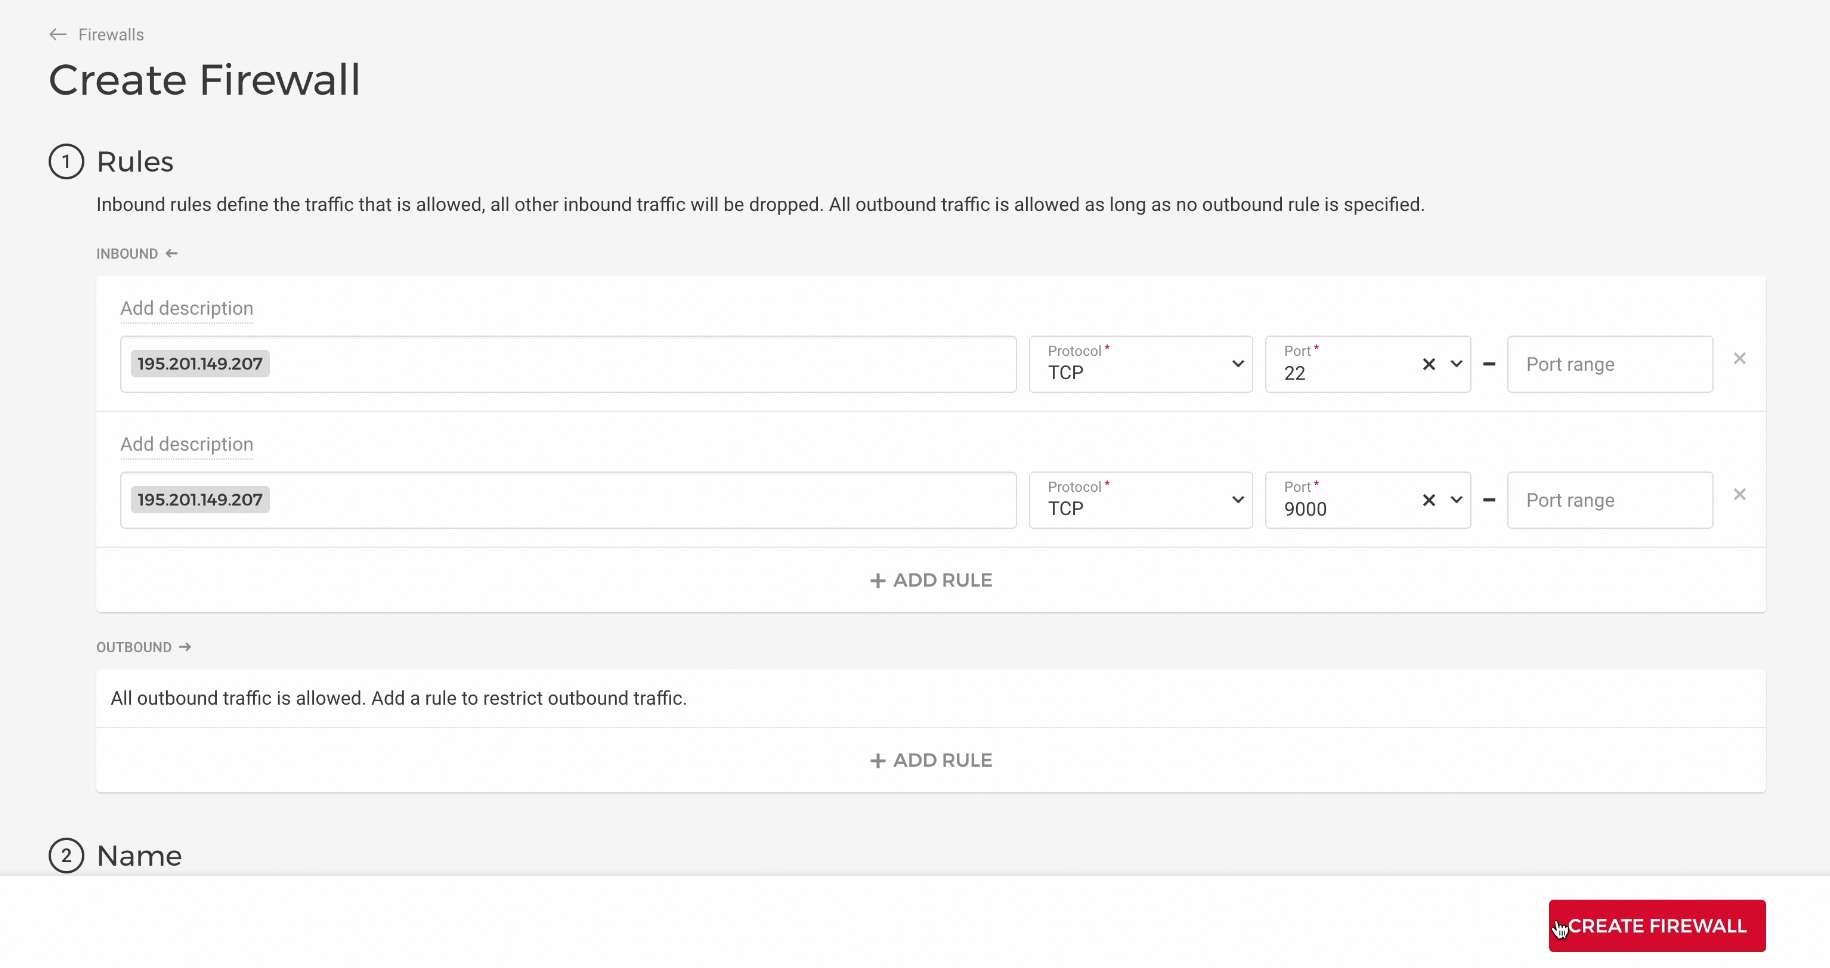
Now remove the default values saying "Any IPv4" and "Any IPv6" by clicking on them and hitting the backspace button of your keyboard. Then, paste in your local machine's IP address.
We need two rules like this. Set the Protocol to TCP for both of them. The port number for one should be 22 which is the SSH port (so you can still SSH into your server). The port number for the other should be 9000 which is the dashboard port.
In the end, click on the "CREATE FIREWALL" button.
If you changed your IP address in the future, you can always update the firewall rules and add your new IP address. That is a good reason why using Hetzner's firewall is better than using a firewall from within the server.
❤️ Like Jesse?
If you like this project, please consider supporting me for free by using my referral links.
It's a win-win, you get free discounts and bonuses, and it helps me to develop more features and content:
Thank you 🙏